
Wings in Half-scale
objectives
The first section of work for the thesis went to building a prototype in half-scale for the wings. Not only was this a way to work out ideas for the full-scale wings, but it also addressed the smaller pair of wings that will be in the show. Modeling was done in Fusion360 after a basic maquette was tested out of cardboard. Prototypes were 3d printed, and various materials tested for the joinery and feathers.
Process
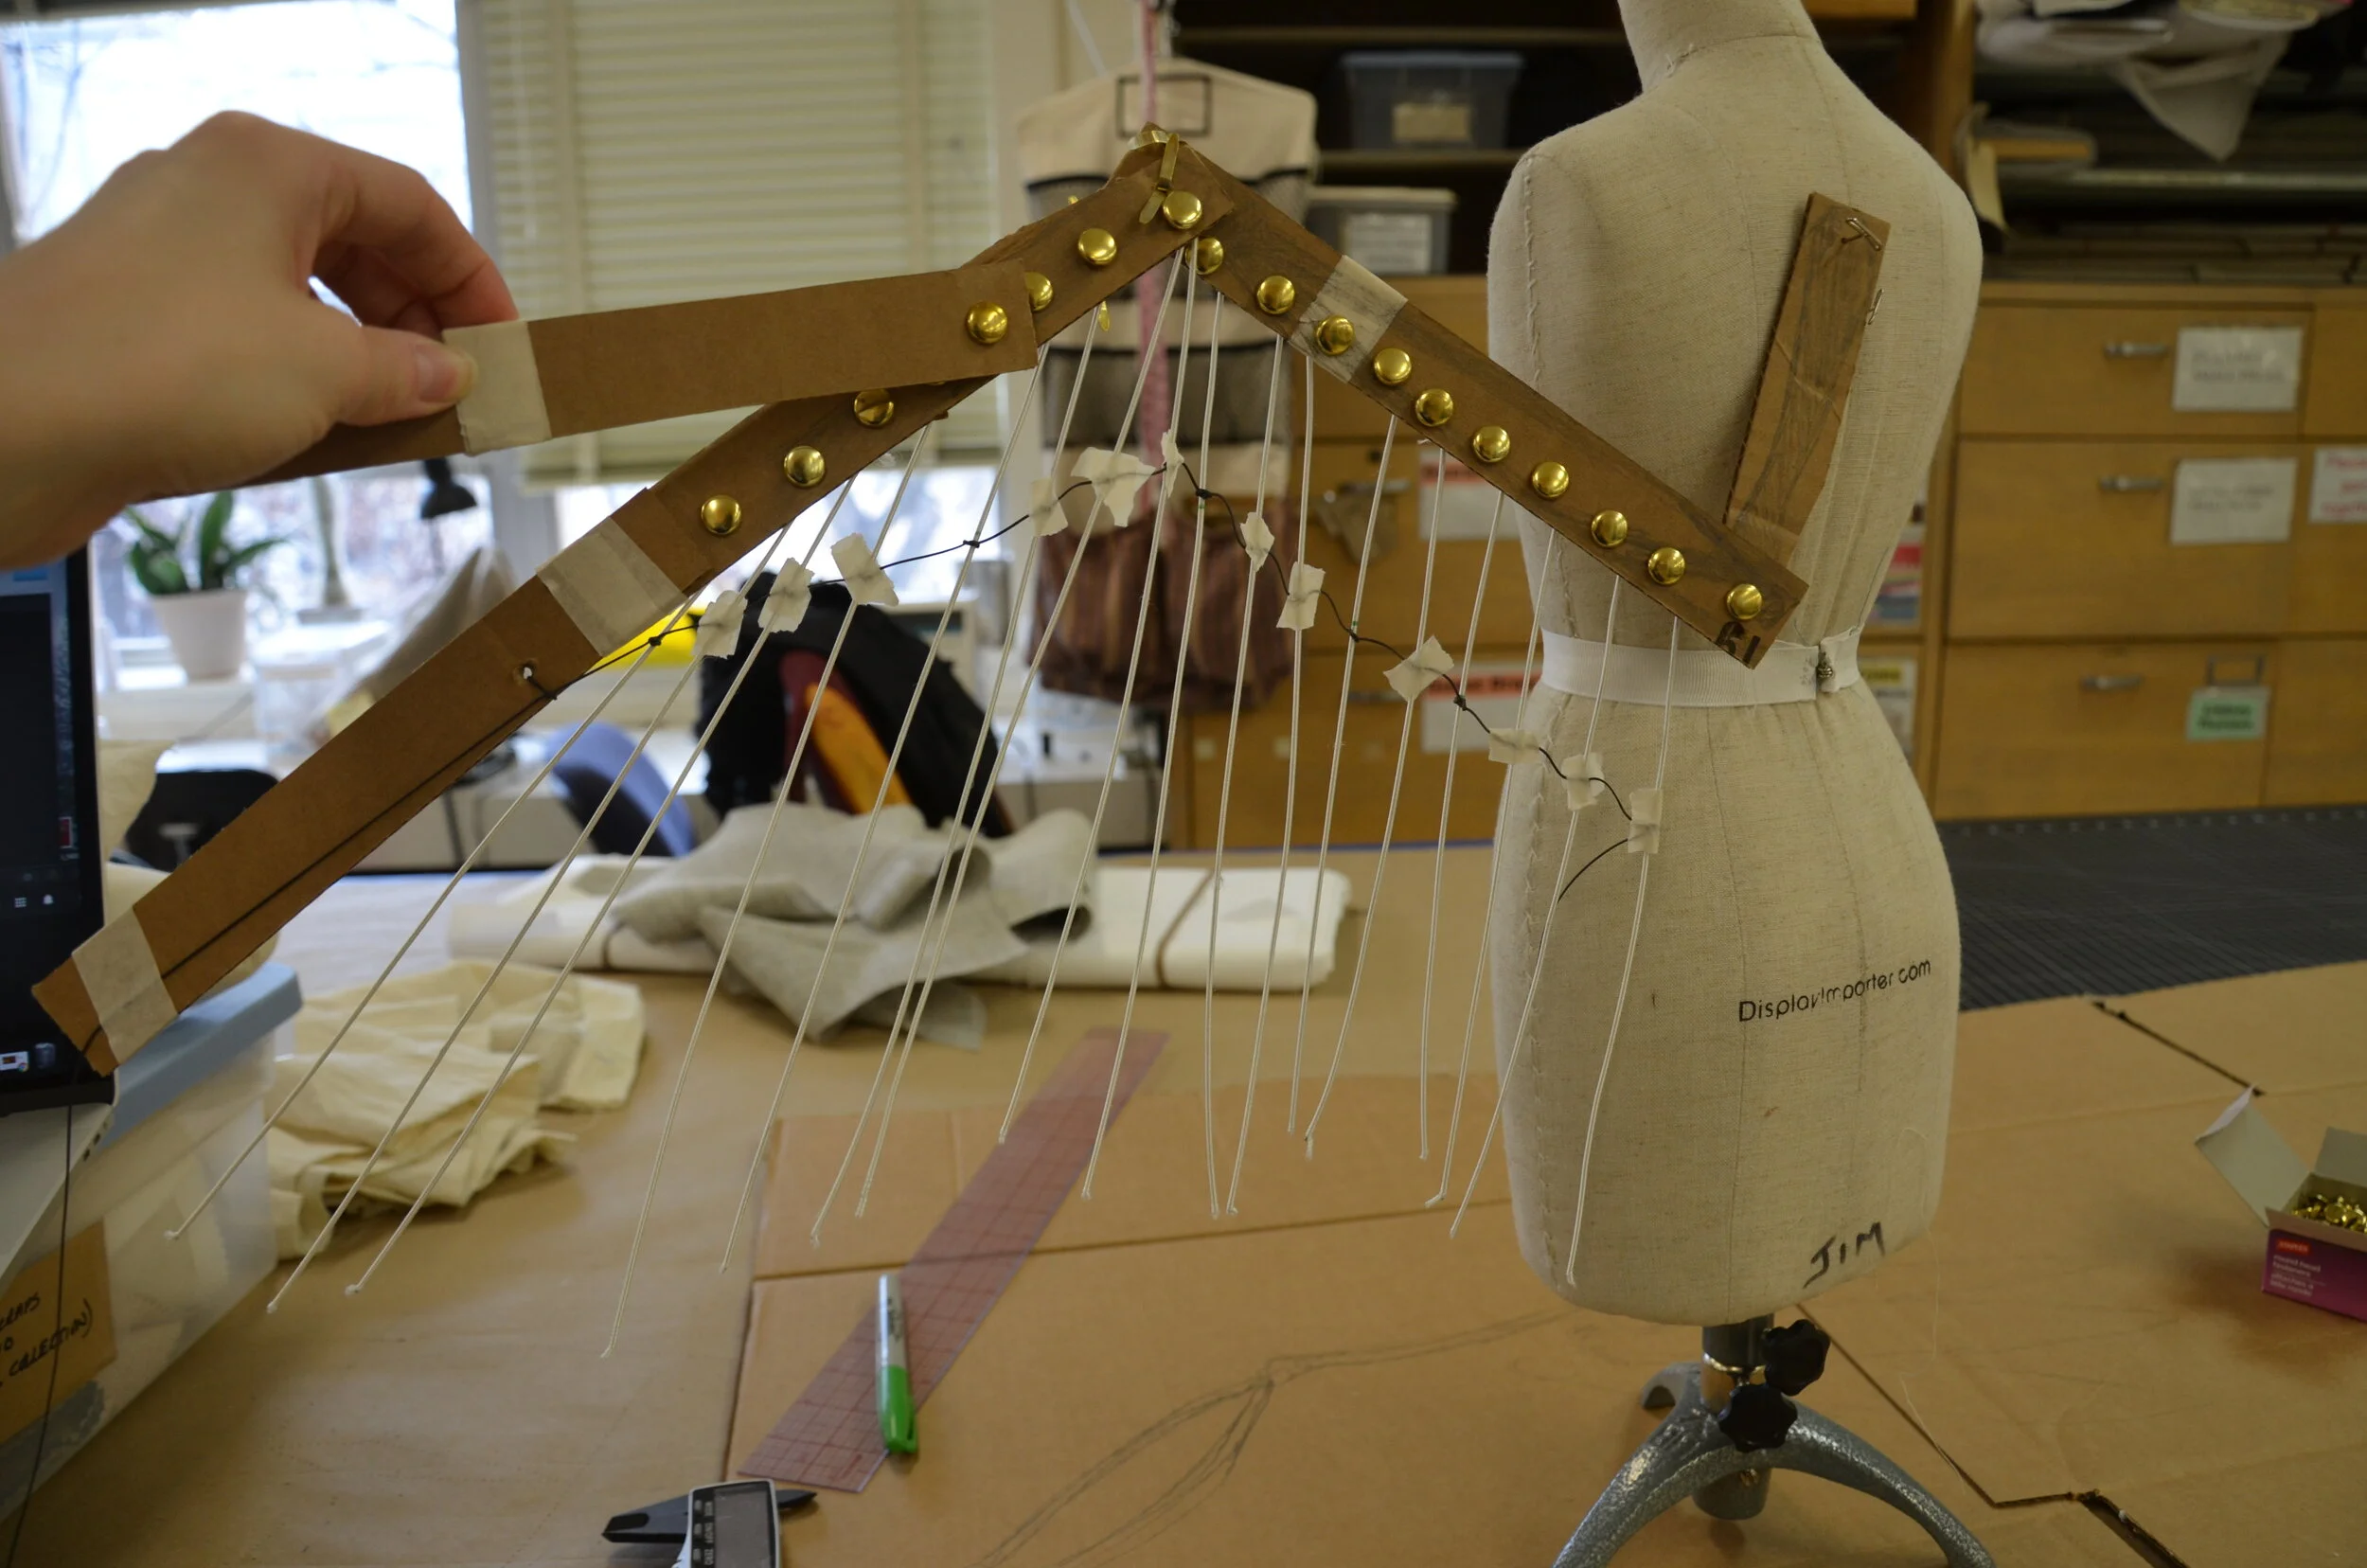
The development of the wings began with a simple cardboard proof-of-concept. From there the first 3D printed prototypes were made, testing hole spacing, length, and providing a base to test the feather materials on. It became clear from this first printed prototype that the wires supporting the wings were going to have to be sturdy yet thin, leading to many wire tests. The aluminum wire in the photo was way too malleable and weak.
It also introduced the question of how to securely yet elegantly get the wires to connect to the wing “bones.” The twisted wire loops used here were clearly not secure and the cut wire edges presented a danger.
The nuts and bolts holding the feathers on also clearly were not going to work. They were visually clunky, and the nuts easily worked themselves off after a little movement testing. Lock nuts wouldn’t solve the clunkiness problem.
Another moment of discovery was the process of stringing the feathers. This step is crucial in controlling how the feathers unfurl and stay spaced. I learned the way they are strung is very important - because this method did not allow the feathers to contract and fold over each other.


Shaping Prototypes
The first prototype confirmed that the size of the model was good, and that a few holes had to be re-spaced. The next prototype tacked how to best shape the wings to create the desired bone look, and to re-space the feather holes.
At this stage I also tested Clevis pins of different types, plastic rivets, and investigated pre-made rods with ball attachments as options for how to best attach the feathers. It was at this stage that I finally decided to investigate custom joints to solve this problem.
Further Shape Development
Once I was pleased with the sizing and shape of the bones, it was time to refine the form. The edges were curves to be more realistic, small adjustments for strengthening were made, and the hole size was readjusted to accommodate the new feather joints. I also began testing a recess in the “humerus” bone that would hold a small S-carabiner. This would allow the wings to be clipped on and off with ease for better storage. Development of the feather joints began as well.

A screenshot of the most current model for the wings in Fusion360.
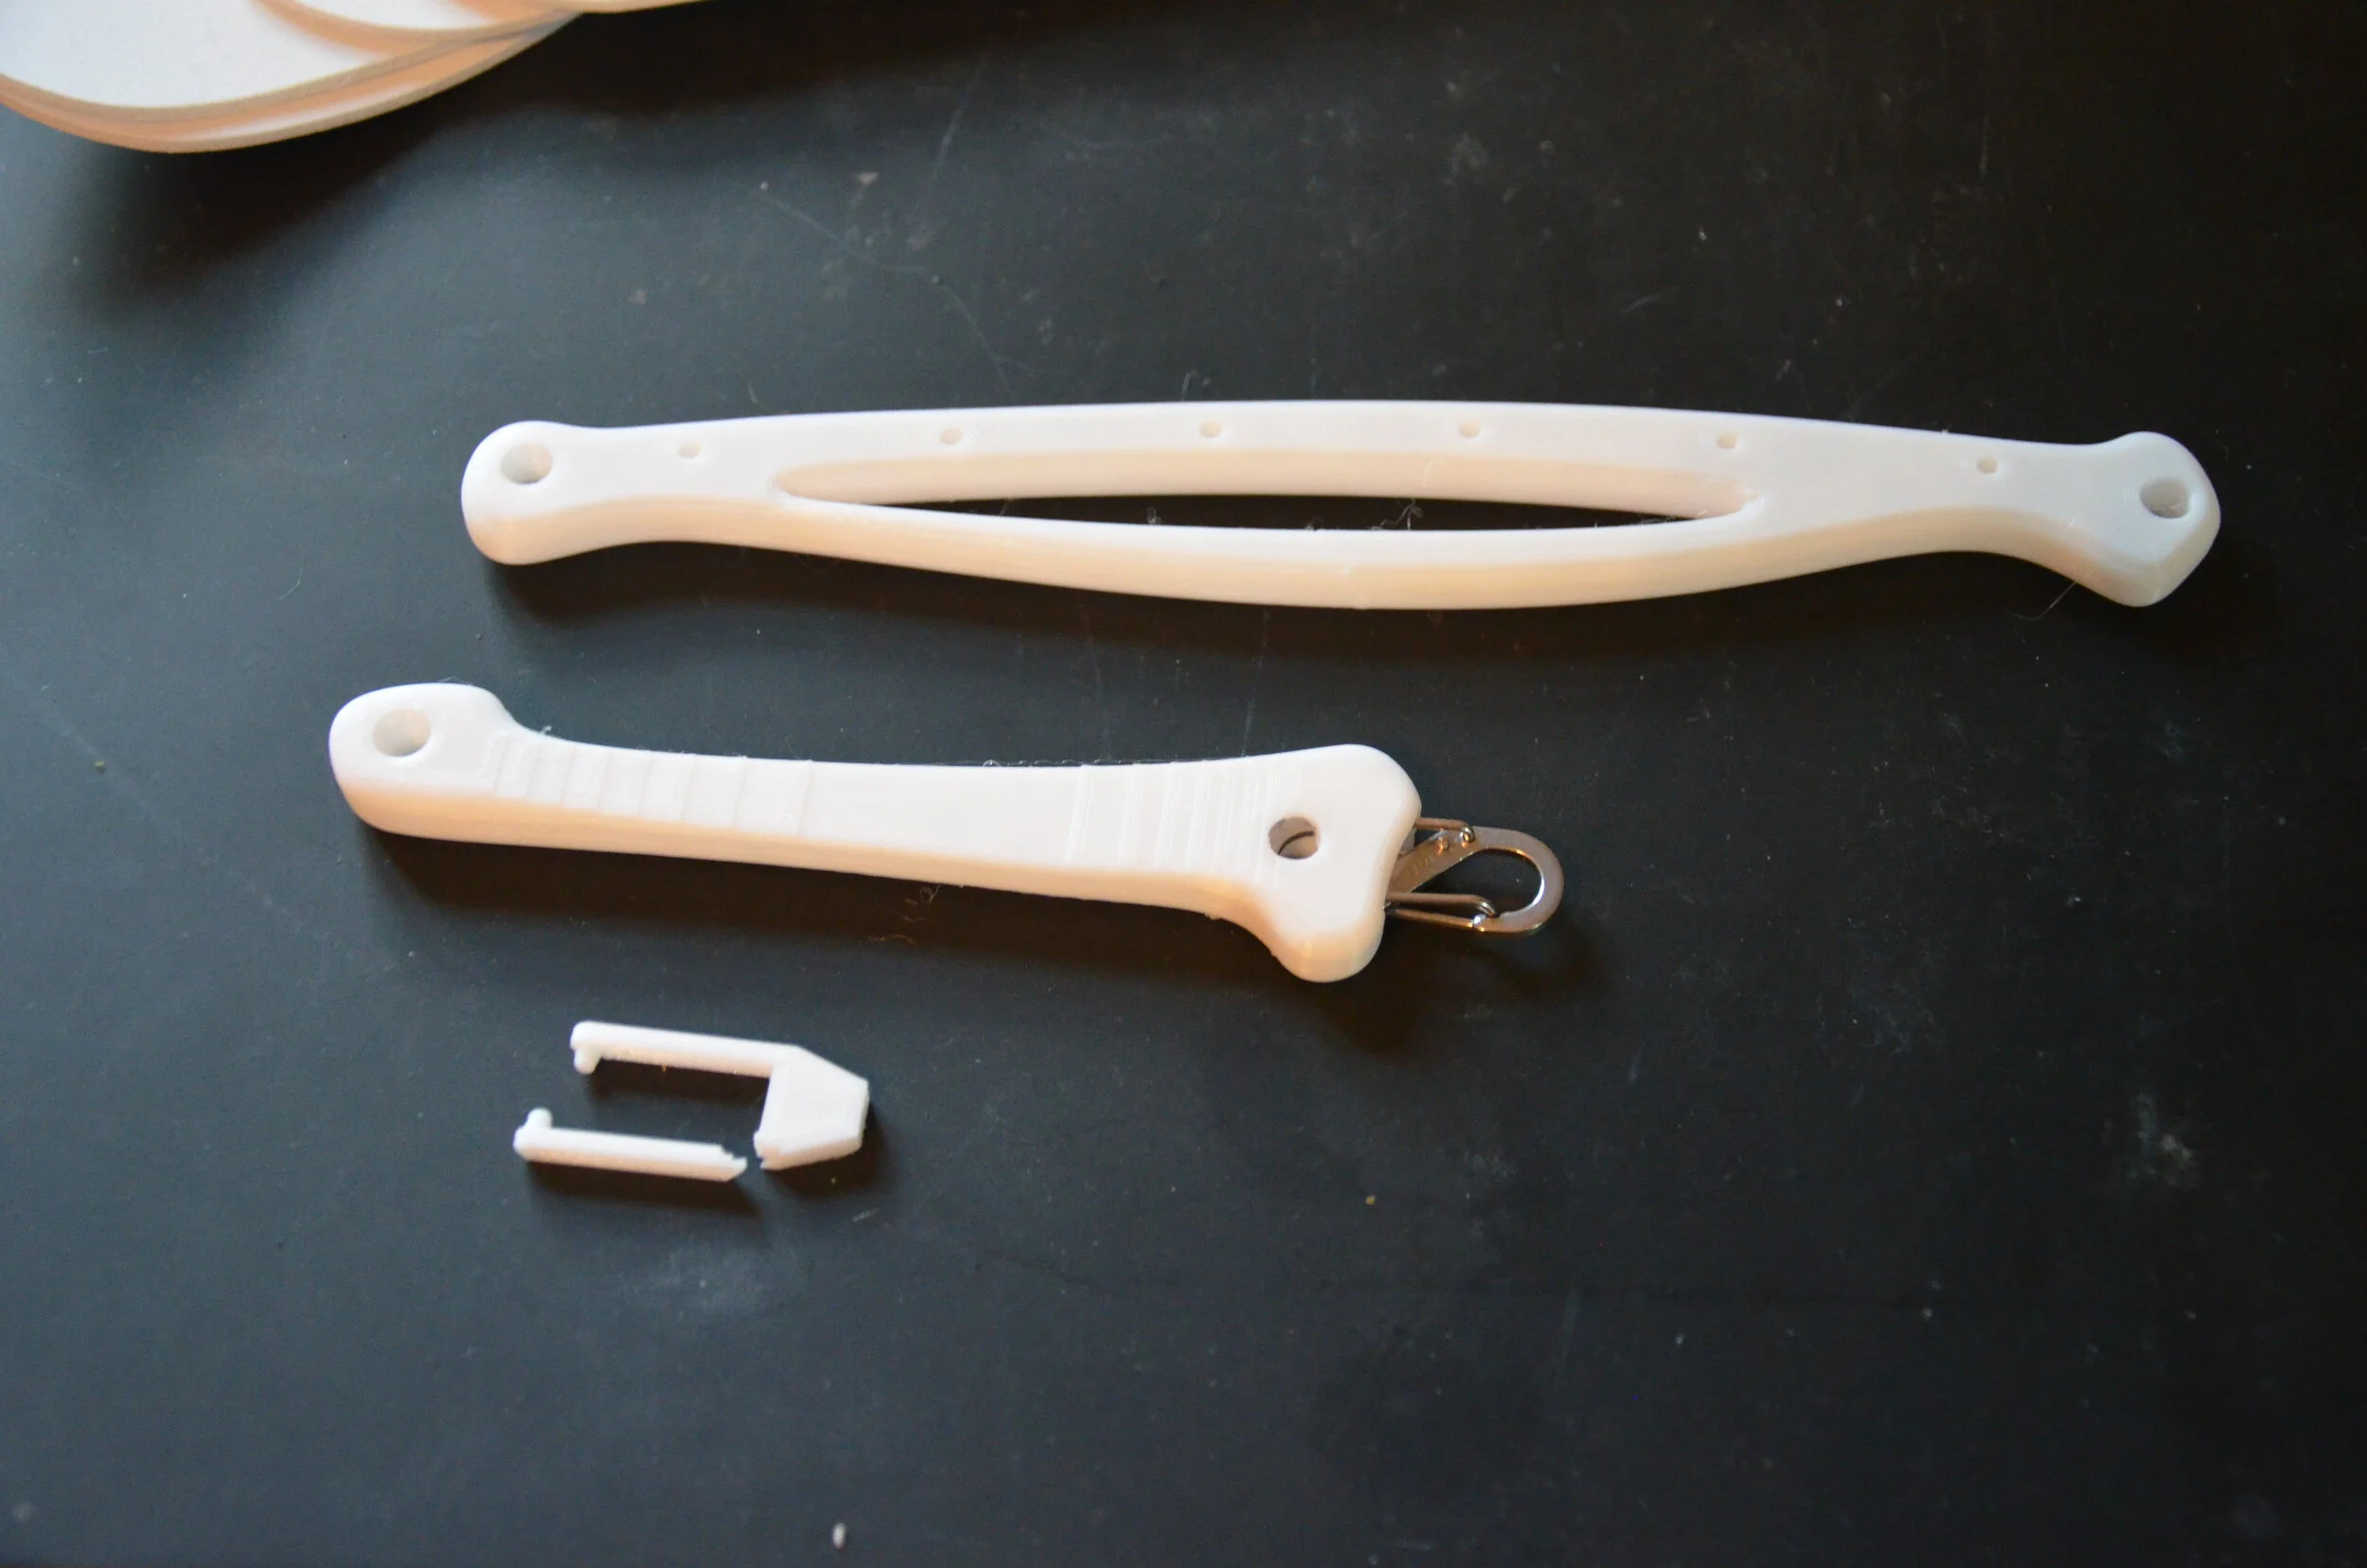
Bone test prints. Note carabiner fit test in second bone, and failed test print of the custom feather joint.

The V-Joint
After trying several different size and shapes, I settled on joining the feathers to the wings with a custom-modeled joint I started referring to as "the V-Joint,” referring to its shape. The V-joint has a hole in the base of the V for the feather wires to be inserted. The wires would be adhered with a plastic-metal epoxy. The joint wraps around the bone, and a wire is slotted through one leg, through the bone, and into the other leg, locking the joint on.

The Progression
Below you can see the four prototypes created, as well as a couple V-joints. Pending discussions with the creative team and performers, the next step is to create the final version of the wings.
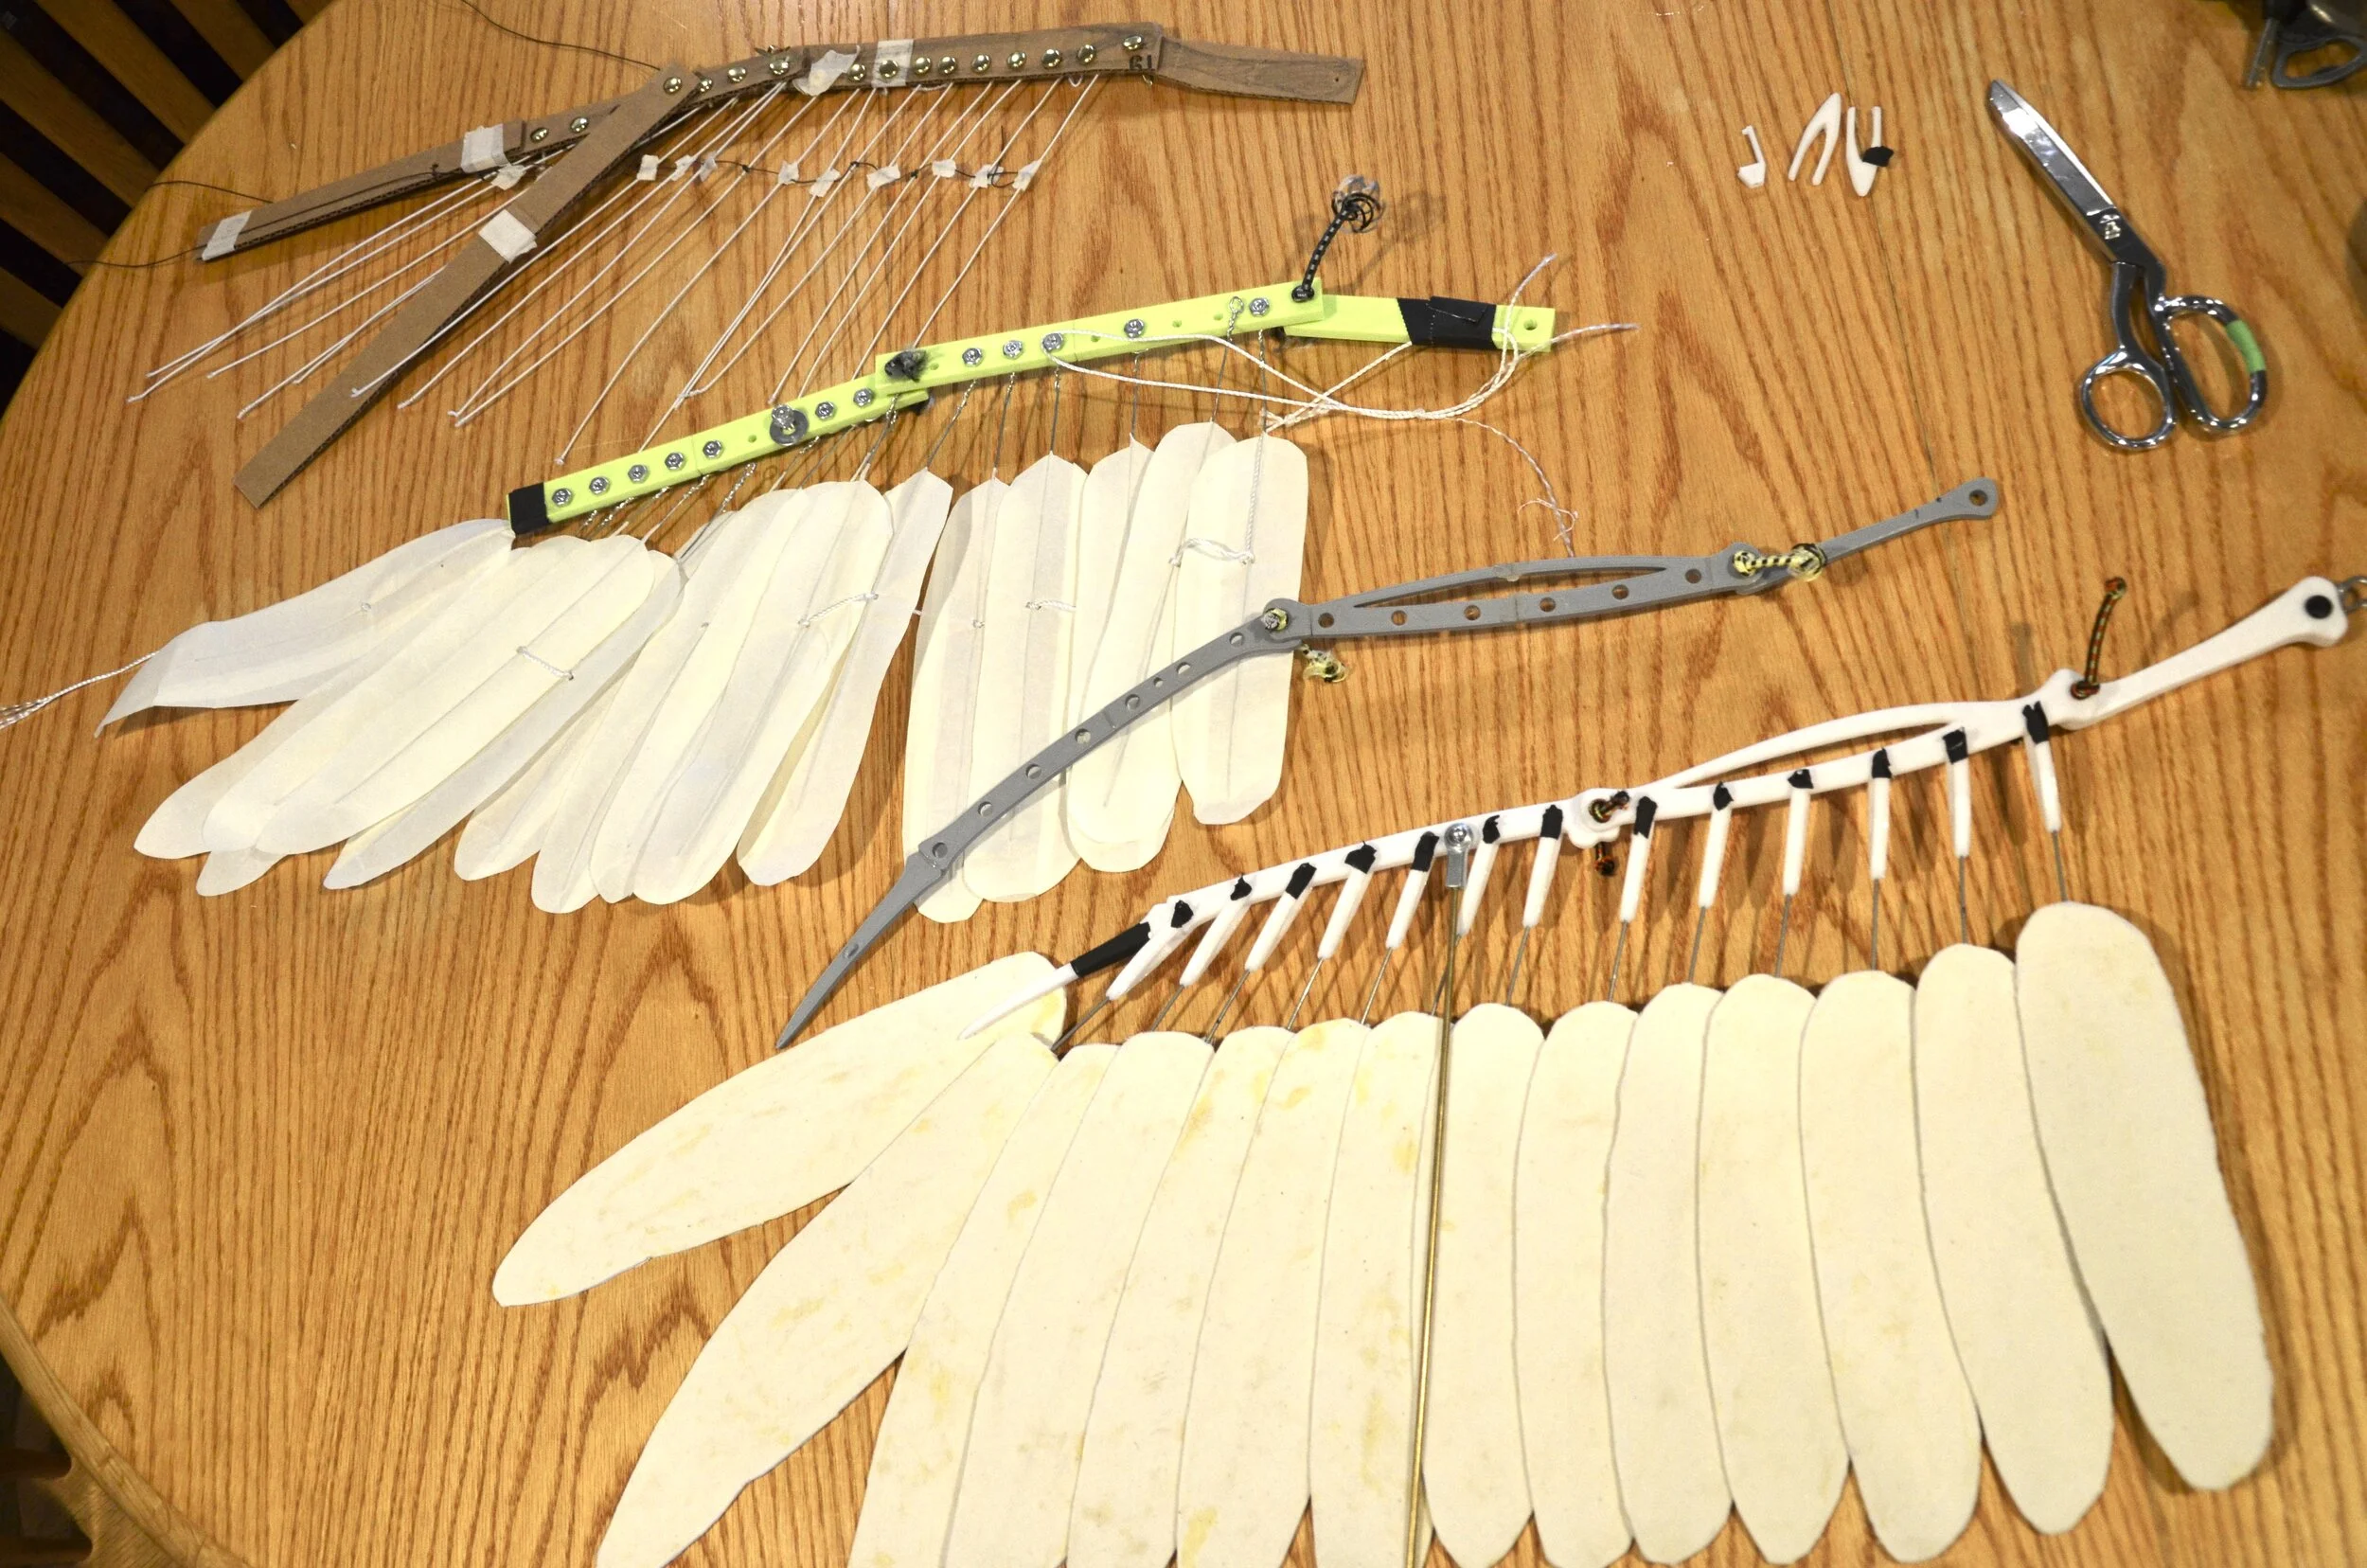
The four prototypes created for the half-scale.